Appearance
构建自定义UX
概述
UI component将结构化工具结果转换为人类友好的界面。它们通常是在iframe内运行的React component,通过 window.openai API与宿主通信,并inline渲染到对话中。
理解 window.openai API
window.openai 是你的component和ChatGPT之间的桥梁。它提供对以下内容的访问:
- 主题 – 用户的明暗模式偏好
- 用户代理 – 设备和浏览器信息
- 区域设置 – 用户的首选语言
- 布局信息 – 可用空间和显示模式
- 工具输入/输出 – 触发此component的工具调用的参数和结果
- Widget状态管理 – 持久化component状态的方法
关键方法
callTool(name, args)– 在MCP服务器上调用工具sendFollowUpMessage(text)– 触发后续对话轮次openExternal(url)– 打开外部链接requestDisplayMode(mode)– 更改应用显示模式(inline、pip、fullscreen)setWidgetState(state)– 持久化component状态
示例钩子: useOpenAiGlobal
typescript
export function useOpenAiGlobal<K extends keyof OpenAiGlobals>(
  key: K
): OpenAiGlobal[K] {
  return useSyncExternalStore(
    (onChange) => {
      const handleSetGlobal = (event: SetGlobalsEvent) => {
        const value = event.detail.globals[key];
        if (value === undefined) {
          return;
        }

        onChange();
      };

      window.addEventListener(SET_GLOBALS_EVENT_TYPE, handleSetGlobal, {
        passive: true,
      });

      return () => {
        window.removeEventListener(SET_GLOBALS_EVENT_TYPE, handleSetGlobal);
      };
    },
    () => window.openai[key]
  );
}搭建Component项目
推荐的项目结构:
app/
  server/            # MCP服务器(Python或Node)
  web/               # Component bundle源代码
    package.json
    tsconfig.json
    src/component.tsx
dist/component.js # 构建输出为iframe打包
你的component必须是单个JavaScript模块,可以由ChatGPT的iframe宿主加载。使用esbuild或类似的bundler:
package.json 中的构建命令:
json
{
  "scripts": {
    "build": "esbuild src/component.tsx --bundle --format=esm --outfile=dist/component.js"
  },
  "dependencies": {
    "react": "^18.2.0",
    "react-dom": "^18.2.0"
  },
  "devDependencies": {
    "@types/react": "^18.2.0",
    "@types/react-dom": "^18.2.0",
    "esbuild": "^0.19.0",
    "typescript": "^5.0.0"
  }
}运行 npm run build 生成 dist/component.js,然后你的MCP服务器将其内联到HTML资源中。
在宿主shell中挂载component
你的component代码应该:
- 从DOM挂载点开始 – ChatGPT会注入一个根元素(通常是
<div id="root">)到你的HTML模板中。 - 使用React或类似框架渲染 – 大多数开发者使用React,但任何可以编译为单个ES模块的框架都可以。
- 订阅宿主全局变量 – 监听
window.openai更改以响应主题切换、数据更新等。
示例component入口点:
tsx
import React from "react";
import ReactDOM from "react-dom/client";
import { App } from "./App";

const root = ReactDOM.createRoot(document.getElementById("root")!);
root.render(<App />);订阅宿主全局变量
ChatGPT会在环境变化时更新 window.openai。使用自定义钩子对React component保持响应:
tsx
import { useOpenAiGlobal } from "./hooks/useOpenAiGlobal";

export function App() {
  const theme = useOpenAiGlobal("theme");
  const toolOutput = useOpenAiGlobal("toolOutput");

  return (
    <div className={theme === "dark" ? "dark-mode" : "light-mode"}>
      <h1>欢迎来到我的component</h1>
      <pre>{JSON.stringify(toolOutput, null, 2)}</pre>
    </div>
  );
}从工具输出渲染
你的MCP服务器在 structuredContent 中返回数据。ChatGPT将其注入 window.openai.toolOutput,你的component可以读取它:
tsx
const toolOutput = useOpenAiGlobal("toolOutput");
const tasks = toolOutput?.structuredContent?.tasks || [];

return (
  <ul>
    {tasks.map((task) => (
      <li key={task.id}>{task.title}</li>
    ))}
  </ul>
);持久化状态
使用 window.openai.setWidgetState(state) 在会话中保存component状态:
tsx
const [viewMode, setViewMode] = React.useState("list");

React.useEffect(() => {
  window.openai.setWidgetState({ viewMode });
}, [viewMode]);

// 恢复状态
React.useEffect(() => {
  const savedState = window.openai.widgetState;
  if (savedState?.viewMode) {
    setViewMode(savedState.viewMode);
  }
}, []);调用宿主操作
你的component可以触发多个宿主操作:
调用工具
tsx
async function handleRefresh() {
  const result = await window.openai.callTool("refresh-data", {});
  console.log("工具结果:", result);
}发送后续消息
tsx
function handleAskQuestion() {
  window.openai.sendFollowUpMessage("告诉我更多关于此任务的信息");
}打开外部链接
tsx
function handleOpenDocs() {
  window.openai.openExternal("https://docs.example.com");
}请求显示模式
tsx
function handleFullscreen() {
  window.openai.requestDisplayMode("fullscreen");
}Component画廊示例
以下是一些展示不同UI模式的component示例:
Pizzaz List
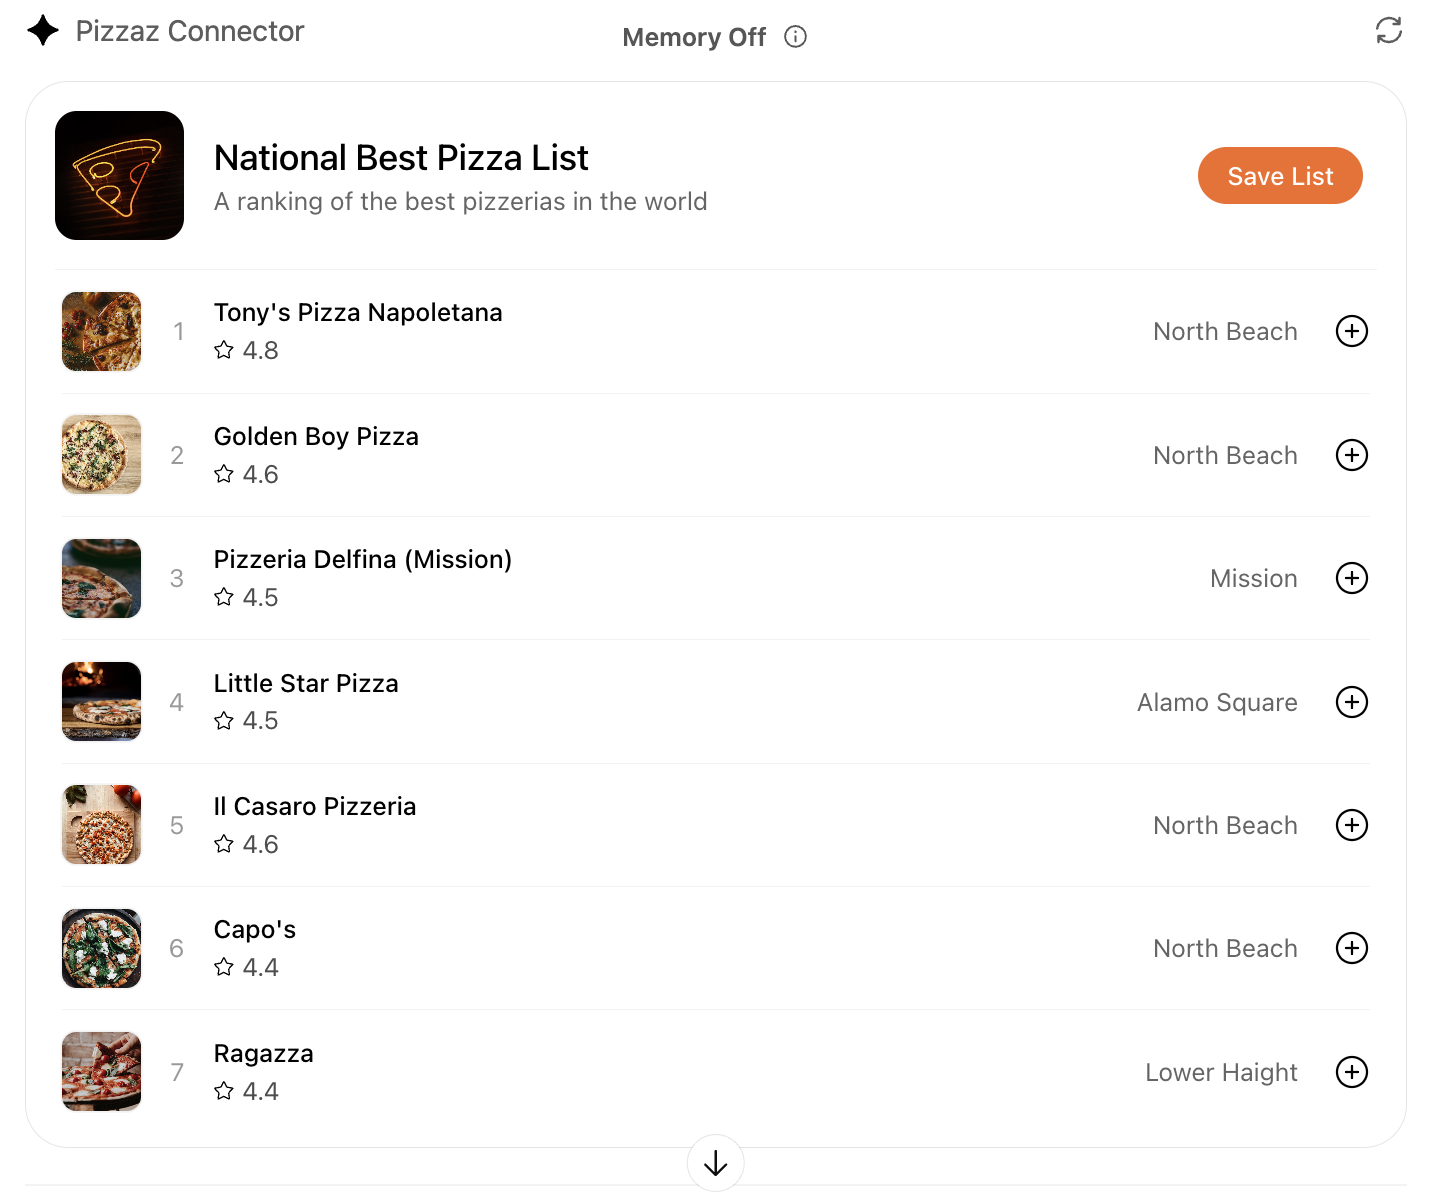
密集信息层次结构的列表布局,平衡了英雄摘要和可滚动排名。
Pizzaz Carousel
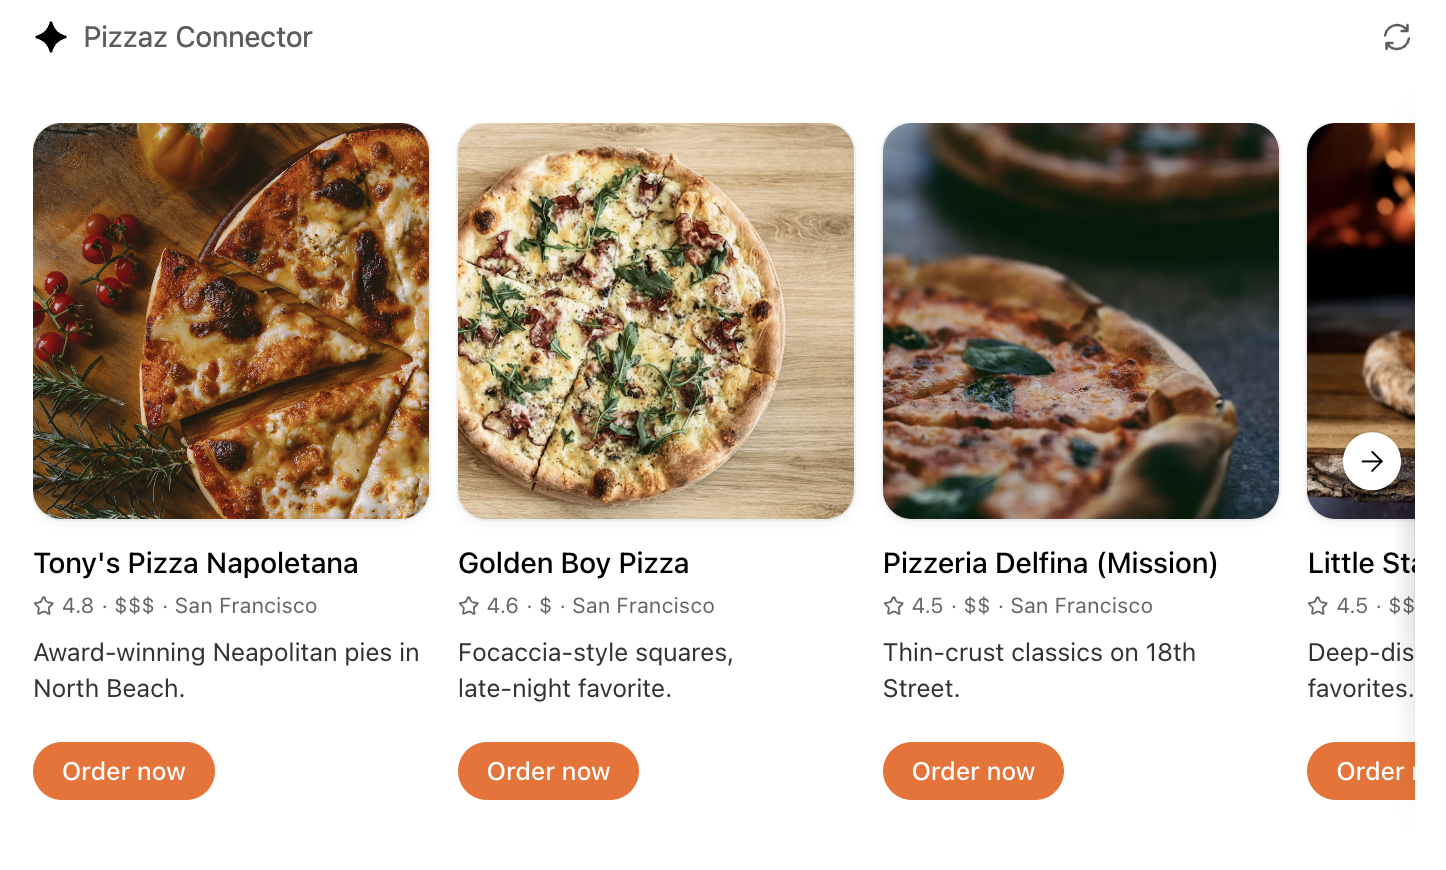
轻量级画廊视图,使用embla-carousel实现触摸友好的滚动。
Pizzaz Map
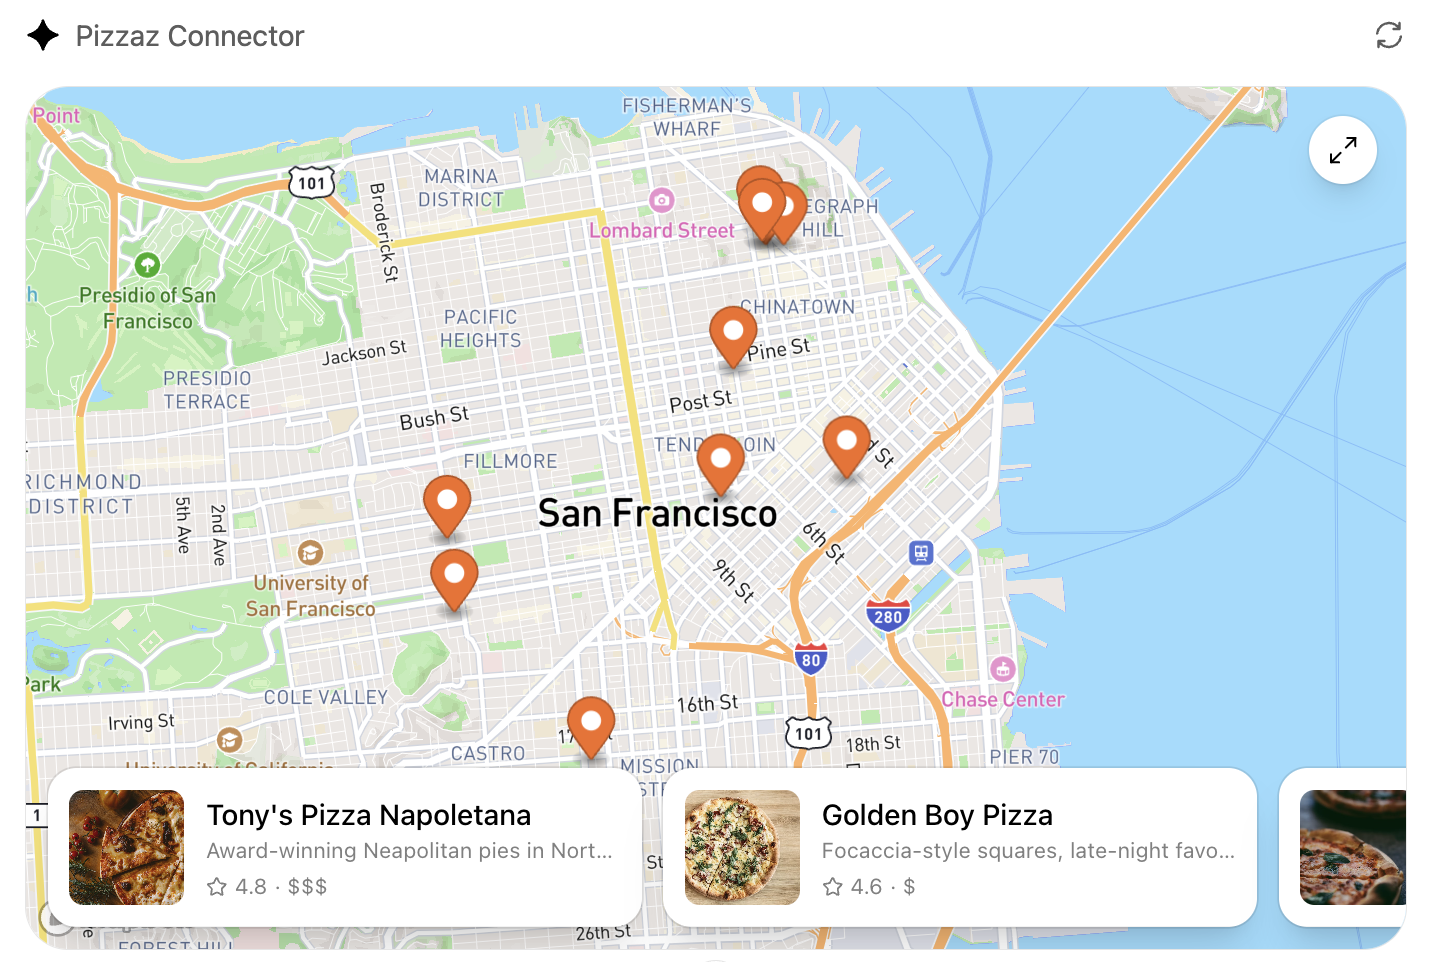
React + Mapbox客户端component,具有标记交互、检查器路由和全屏处理功能。
Pizzaz Album
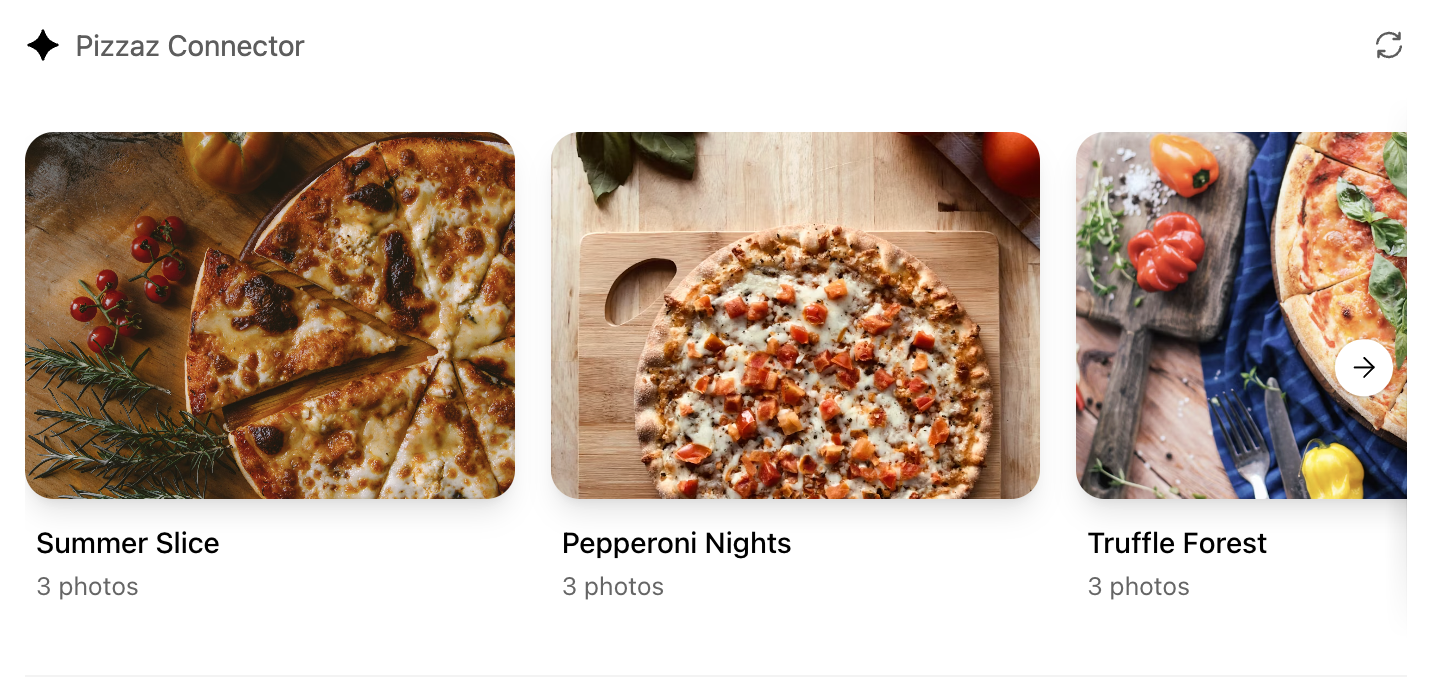
网格布局,用于显示具有缩略图和详细信息的媒体集合。
最佳实践
保持依赖项精简
你的component bundle大小会影响加载时间。最小化依赖项并使用tree-shaking来保持bundle小。
使用钩子进行状态管理
React钩子(如 useOpenAiGlobal)使你的component与宿主环境保持同步,而无需手动事件监听器。
实现布局响应性
你的component可能在不同的显示模式下渲染(inline、pip、fullscreen)。使用 window.openai.displayMode 和 window.openai.layoutInfo 来调整你的UI。
tsx
const displayMode = useOpenAiGlobal("displayMode");
const layoutInfo = useOpenAiGlobal("layoutInfo");

return (
  <div style={{ width: layoutInfo.width, height: layoutInfo.height }}>
    {displayMode === "fullscreen" ? <FullView /> : <CompactView />}
  </div>
);支持导航和路由
对于具有多个视图的复杂component,使用客户端路由(例如React Router或简单的状态机):
tsx
const [route, setRoute] = React.useState("home");

return (
  <div>
    {route === "home" && <HomeView onNavigate={setRoute} />}
    {route === "detail" && <DetailView onBack={() => setRoute("home")} />}
  </div>
);处理加载和错误状态
始终为异步操作提供反馈:
tsx
const [loading, setLoading] = React.useState(false);
const [error, setError] = React.useState(null);

async function handleAction() {
  setLoading(true);
  setError(null);
  try {
    await window.openai.callTool("my-tool", {});
  } catch (err) {
    setError(err.message);
  } finally {
    setLoading(false);
  }
}

if (loading) return <Spinner />;
if (error) return <ErrorMessage message={error} />;后续步骤
现在你已经构建了自定义component,请浏览身份验证和存储页面,了解如何添加用户身份和持久化,或查看示例页面以获取完整的端到端演示。